Handling Calendar Invitation Spam - Apple Club |
Back to: 
Tweet
If you receive an invitation on iOS or macOS through the Calendar app (called "iCal" in OS X Lion (10.7) and earlier) which appears to be spam, this article will outline the appropriate steps to deal with the situation.
Do NOT Click "Decline"
One thing that is important to note is that clicking "Decline" may actually increase the amount of spam that you receive. The spammers typically send out these "invitations" to several email addresses, and they have no idea whether any of those addresses are valid or not - they just choose a random sequence of characters. If you click "Decline" after receiving such a spam invitation, the spammers are notified, so then they know that your address is valid, and will likely increase the amount of spam that they send.
It is also worth noting, however, that since the spammer's email selection is random, receiving one of these spam invitations does not mean that anyone has access to your account. Even if a spammer was targeting your email address specifically, they would only need to know your email address, and it does not mean they have your password.
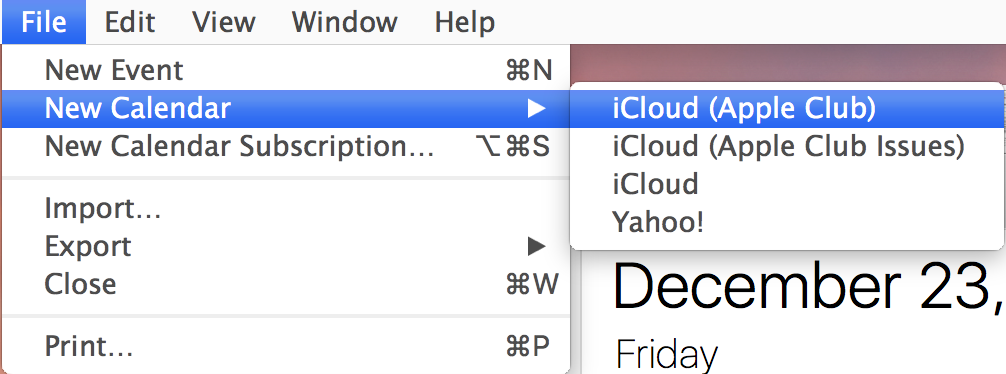
Create a New Calendar
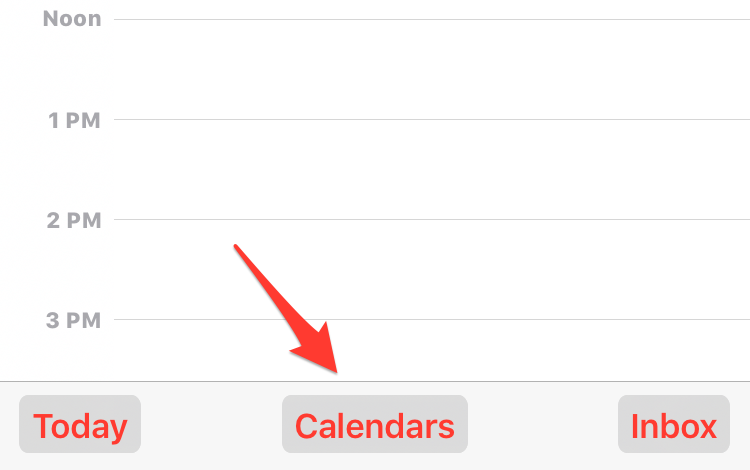
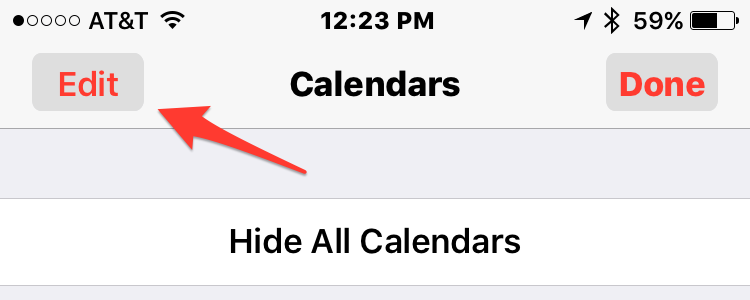
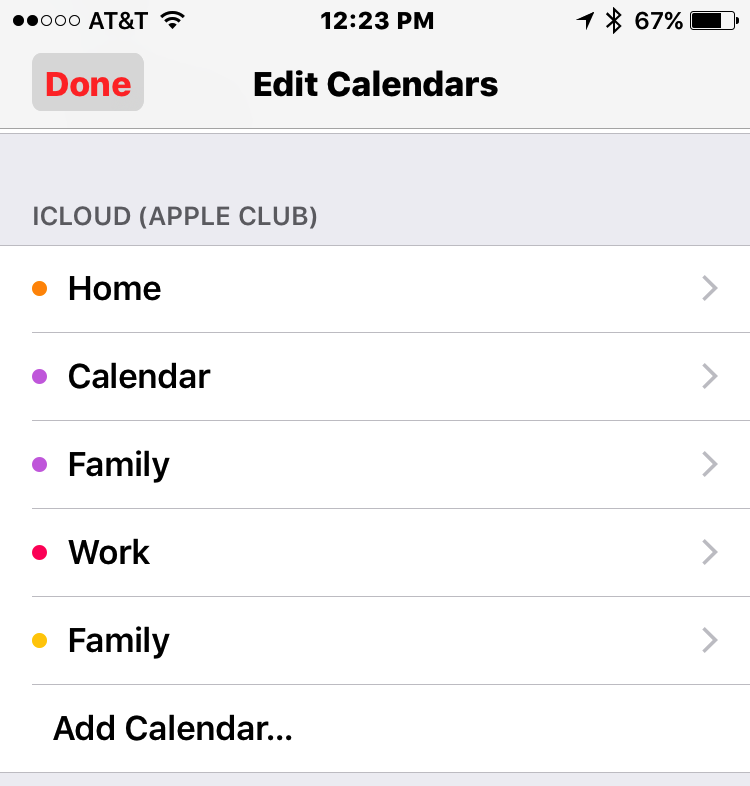
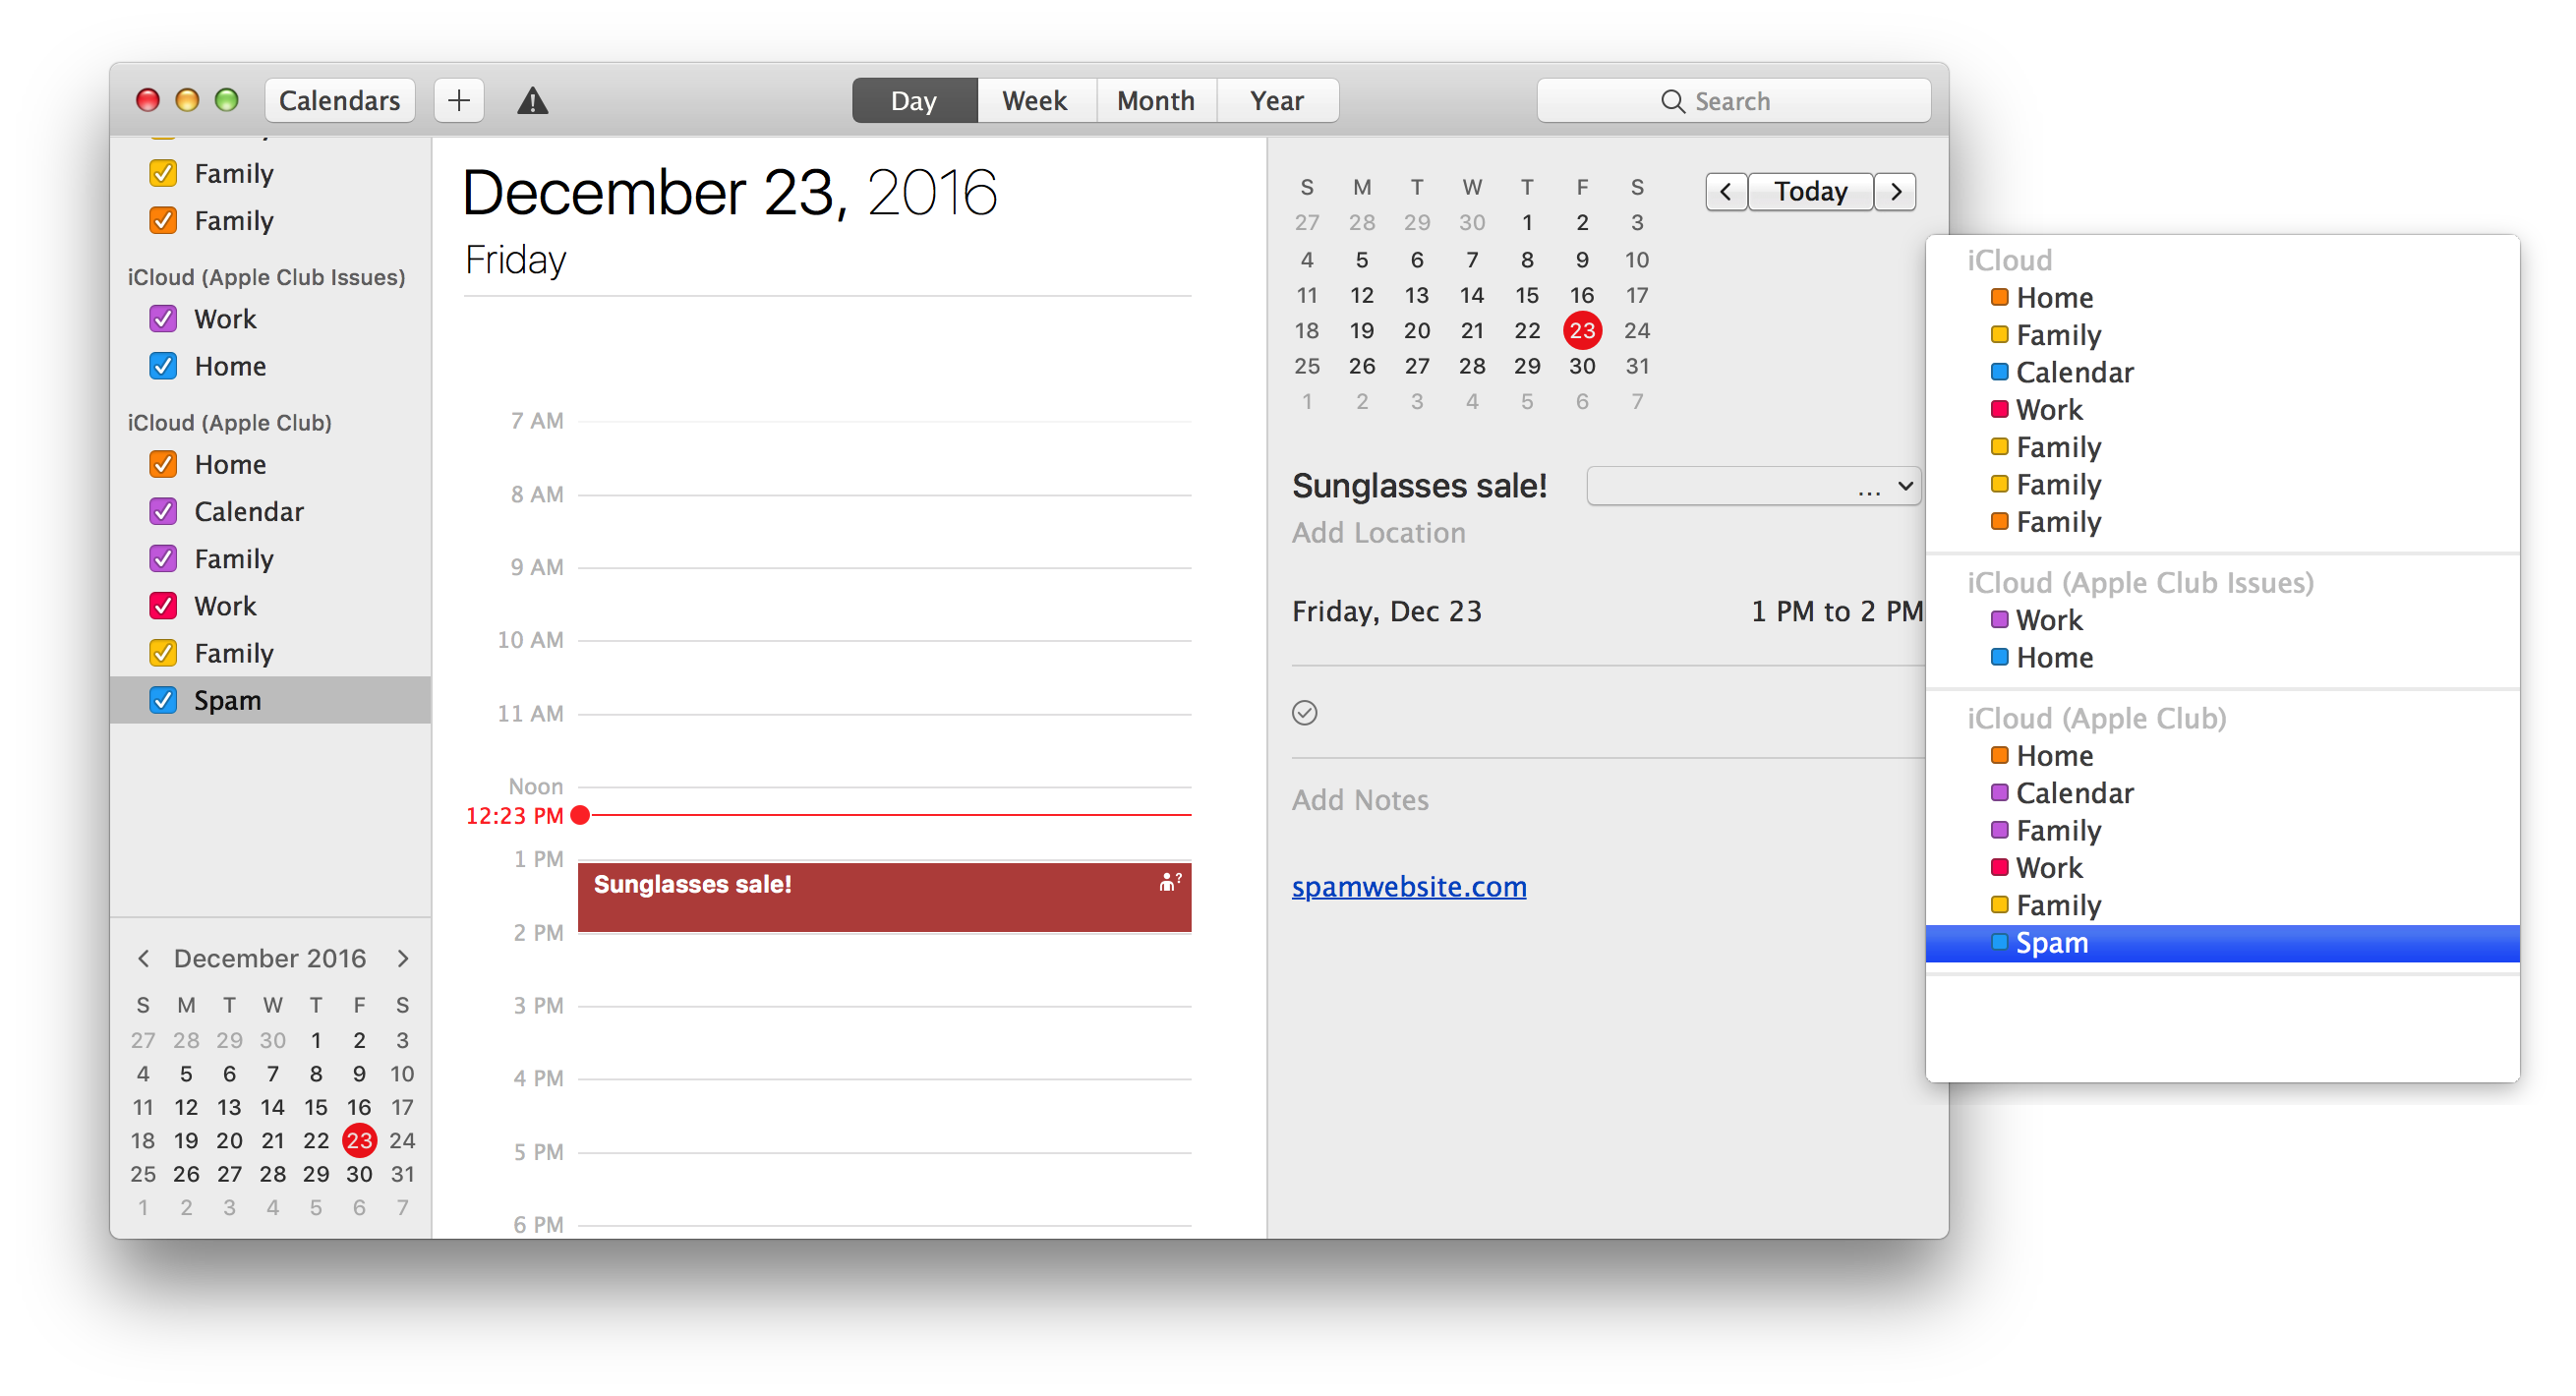
The first step in dismissing the calendar invitation without notifying the sender is to create a new calendar. Make sure that you create the new calendar for the same account at which you received the spam. On a Mac, open Calendar (or iCal), and go to File > New Calendar, and select the appropriate account. On an iOS device (iPhone, iPad or iPod touch), open Calendar, and go to Calendars (at the bottom center of the screen) > Edit, scroll down to the appropriate account, and tap "Add Calendar..."
Mac
iOS
1. |
2. |
3. |
Move and Delete the Event
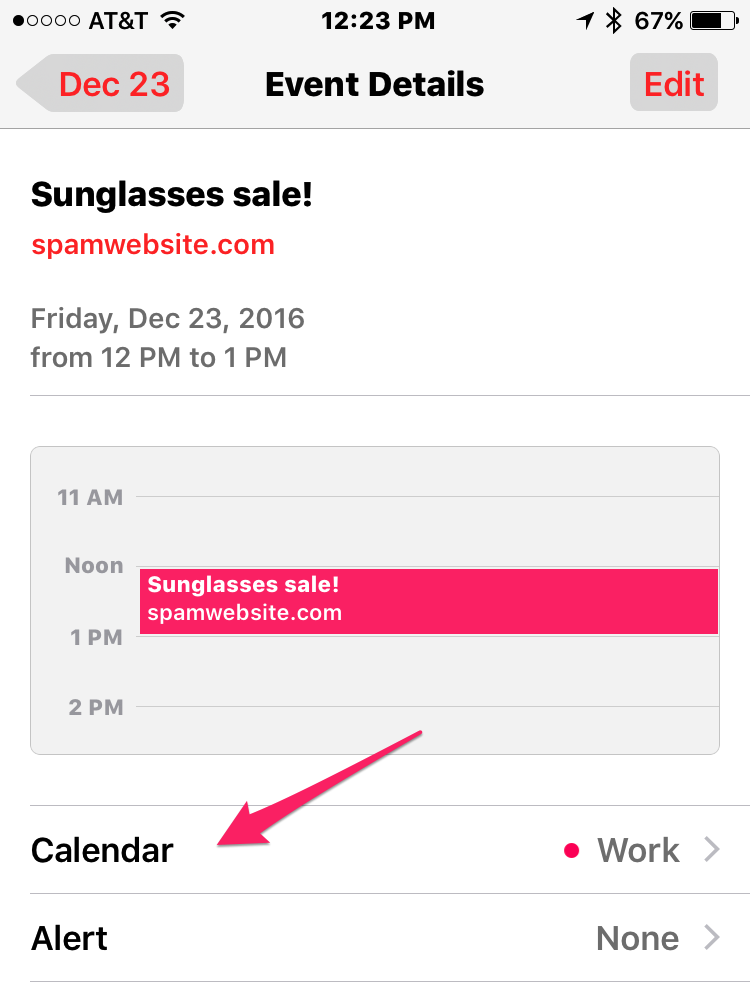
If you move the spam calendar event to the calendar you just created, and then delete that calendar (not the individual event), it will remove the invitation without notifying the sender. On a Mac, if you are in the Month view, right click on the spam calendar event, click the "Calendar" menu from the pop-up menu, and then select the calendar that you created. If you are in the Day view, do a normal (left) click on the event, on then in the right-hand column, just to the right of the event name, click on the pop-up menu and then click on the name of the calendar that you just created. On iOS, tap on the event, then tap on the Calendar menu, and finally tap on the name of the calendar that you just created.
Mac
iOS
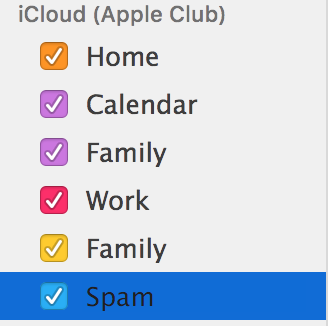
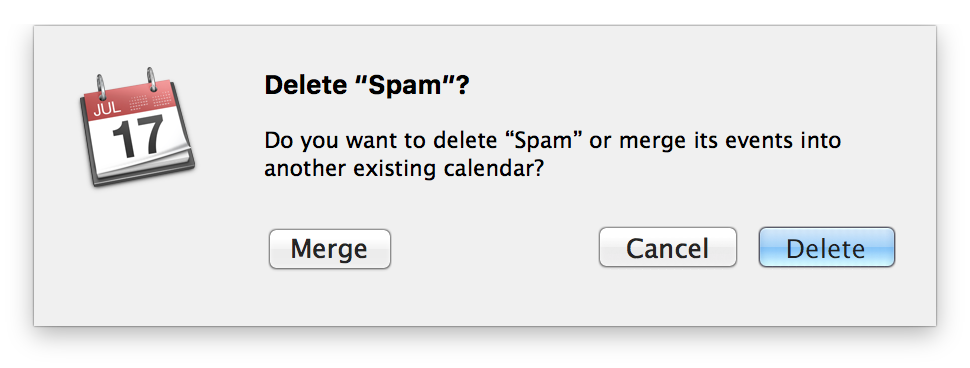
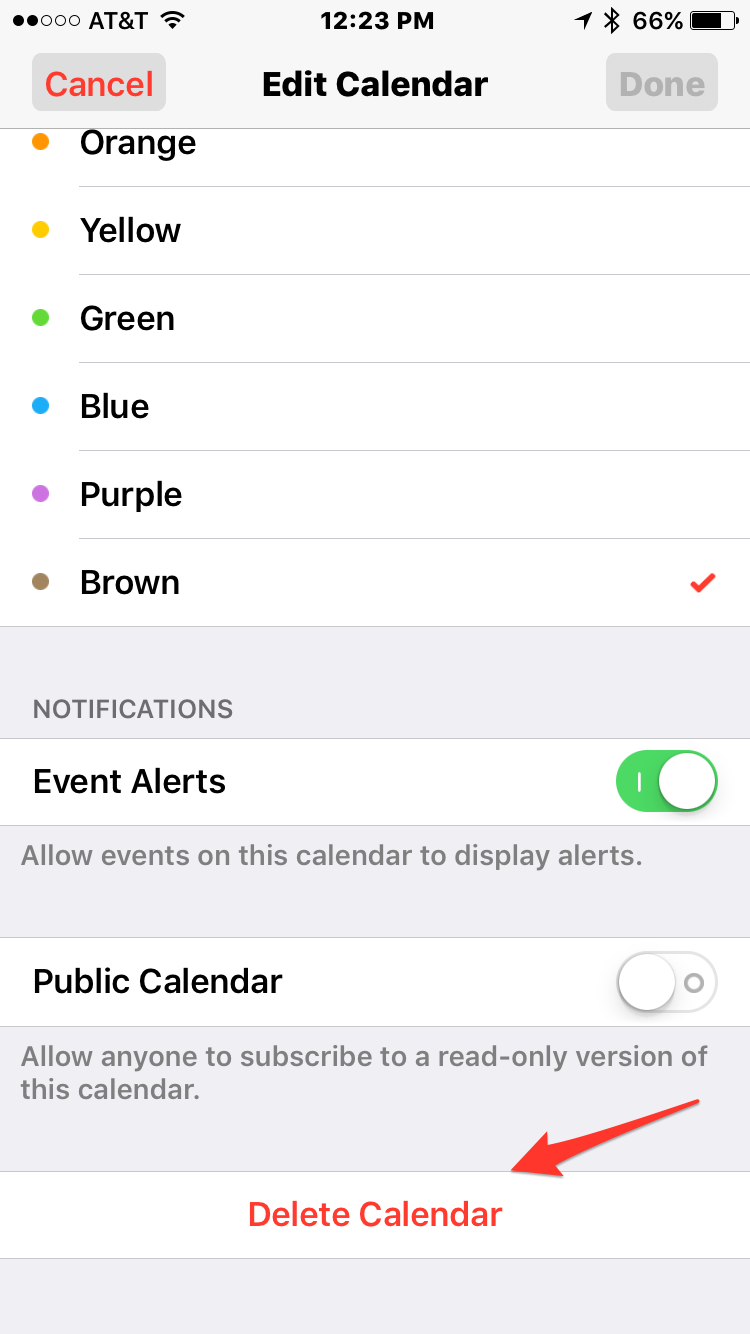
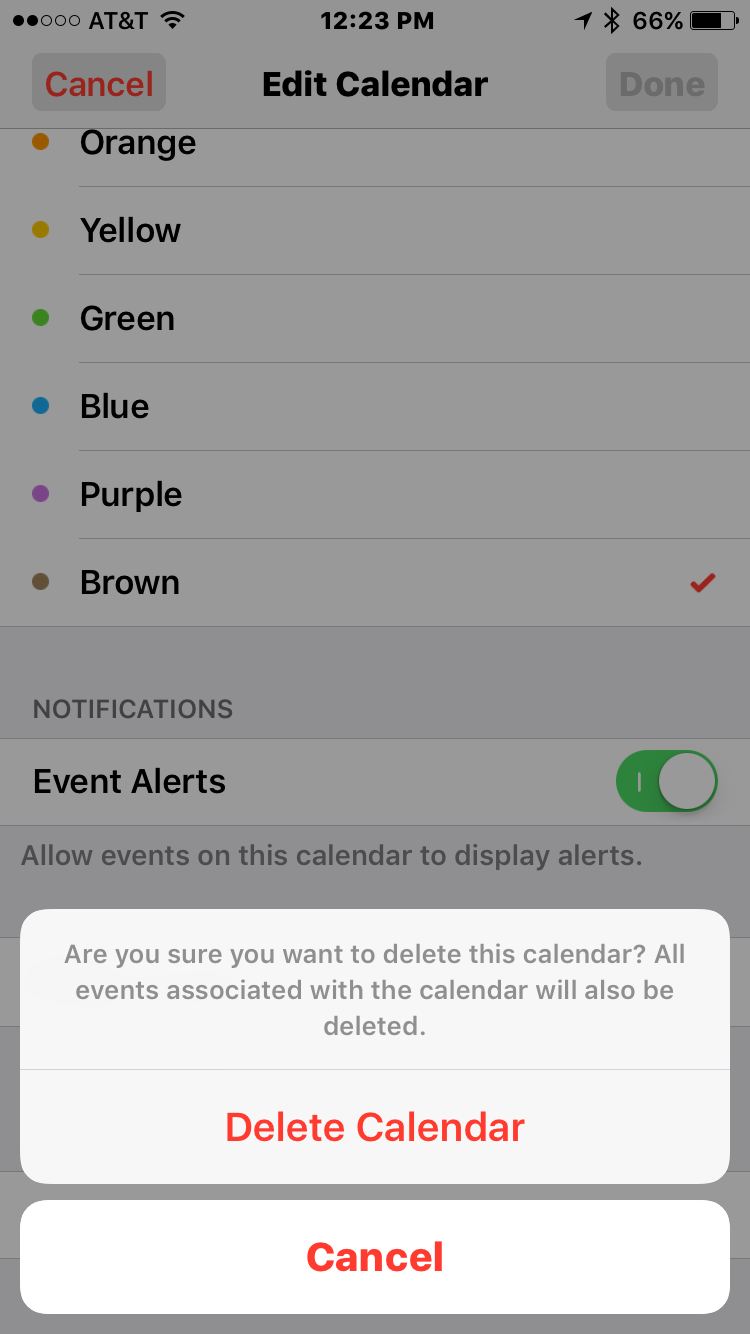
After the event is on the new calendar, you can delete the calendar. On a Mac, first make sure the calendar list is showing in the left sidebar. If it is not, click on the "Calendars" button near the upper left of the window, in the toolbar. Next, find the calendar you created, right click on it, and then click delete. A pull-down sheet will appear with a dialog asking you if you want to delete or merge the calendar. Select "Delete." On iOS, tap on "Calendars" and then "Edit" as described earlier. Select the calendar that you created. Scroll down to the bottom and tap on "Delete Calendar." Tap "Delete Calendar" again at the bottom when the confirmation screen appears.
Mac
1. |
2. |
3. |
iOS
1. |
2. |
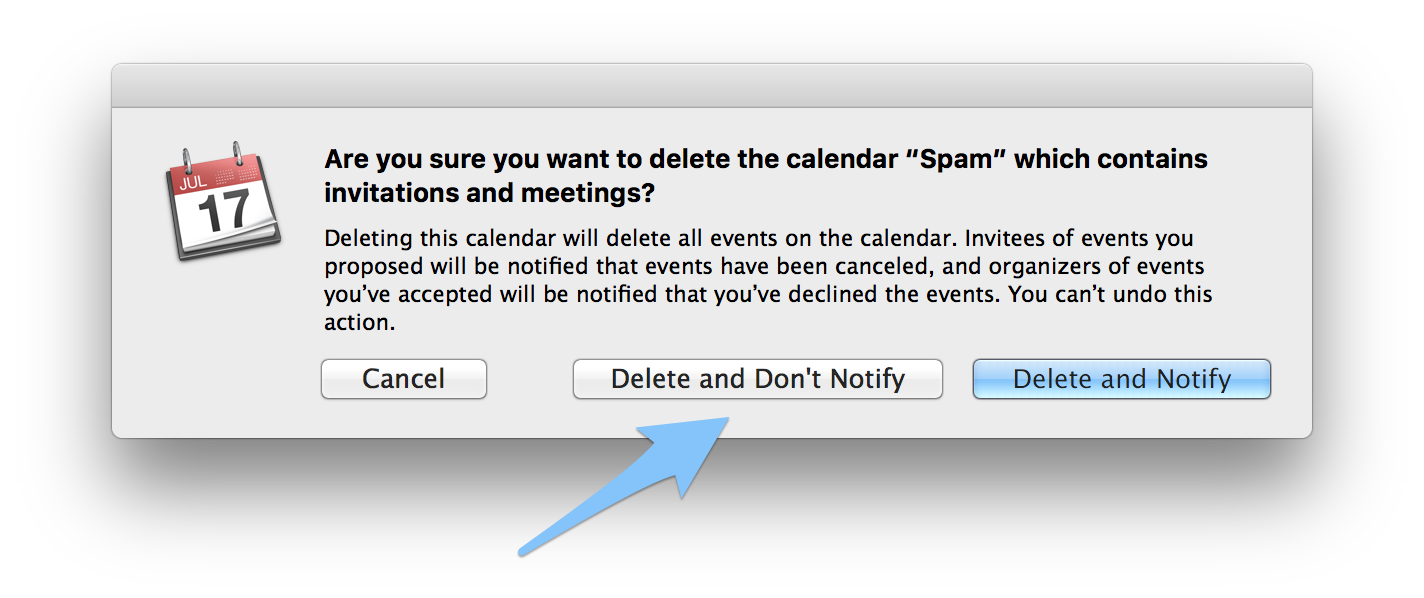
IMPORTANT: (Mac only) You may see a second dialog window informing you that the calendar you want to delete contains invitations, and asking whether or not you want to notify the event organizers. Be sure to click on "Delete and Don't Notify," as shown below.
Receive Calendar Invitations by Email
As an alternative to the above method, if you have an iCloud account, you can choose to disable in-app calendar notifications, and instead choose to receive the notifications by email. This allows you to more easily block the senders of these invitations since you can do it via email. Consult your mail provider on how to block email addresses. As a drawback, you will no longer have the convenience of receiving invites directly in the Calendar app.
To begin, go to http://icloud.com on a Mac or Windows PC, sign in, and click on the Calendar icon. Click the gear icon in the lower left of the window, and click Preferences. Lastly, click the "Advanced" tab, and click the bottom option for "Email to [your email]."
iCloud.com
1. |
2. |
| Back: |
Ask: |
Rate:
 |
Share: |
Print: |
Article ID: AA1142
|
Previous Article |
Next Article |
|
Guide to Built-In Apps on iOS |
Hardware Defect: Home or Power Button |
Overall User Rating: [NO RATINGS]
