Forcing an iPod to Restore - Apple Club |
Back to: 
Tweet
Sections in this article:


If you are having trouble getting your iPod nano or classic (untested on iPod shuffle) to restore, this article will provide a method for placing the iPod into Recovery mode. If you have an iPod touch or another iOS device, please see this article instead.
NOTES:
- This method should only be used as a last resort, and is not an official troubleshooting step (it's an advanced step). You should first try resetting your iPod per Apple's instructions, and if that does not solve the issue, doing a regular restore in iTunes. You will have to reload data onto your iPod after the procedure in this article
- The method described here is for Mac users. If you are able to follow Part 1 of this article using an alternative method on a PC, this should still work. If not, but you have a way to access a Mac, then you can complete Part 1, then restore the iPod using your PC's iTunes application
Connect your iPod to your Mac. If the connection is successful, you should see an iPod icon on your desktop.
If not, then either your Mac does not recognize your iPod, or your Finder preferences are set to not show iPods. To check your preferences, click on a blank area on your desktop to ensure that "Finder" is shown in the upper left of your Mac's menu bar at the top of the screen. Then, in the menu bar, go to Finder > Preferences > General. Under "Show these items on the desktop," make sure that the box for "CDs, DVDs, and iPods" is selected:


Click on the "Erase" button near the top of the window. Leave all of the fields at their default values (you can rename it if you want, but once this method is over, it will be renamed "Apple iPod Media" again).

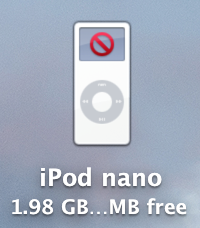
Wait until Disk Utility indicates that the erase is complete, then disconnect your iPod. It should be displaying a "Use iTunes to restore" or "Do not disconnect" screen with a typeface which looks like the one seen on the original iPod. Once you have reached this step, all that is left is to restore in iTunes.
When you connect your iPod to your computer and launch iTunes, a dialog window from iTunes should appear, saying that it has detected an iPod in Recovery mode. Click OK, then click "Restore iPod." If you are using a Mac, you may be told during the restore that "iTunes wants to make changes," in which case you would need to enter an administrator's password.

Because this method involved erasing the iPod hard disk, iTunes may have trouble restoring. Although this procedure can usually be executed without error, you may see Error 1433 or similar. In this case, first try the steps in this Apple article. If that does not work, try restoring on a different computer, preferably with iTunes 11 or earlier on it. You might also try repeating Part 1 once or twice.

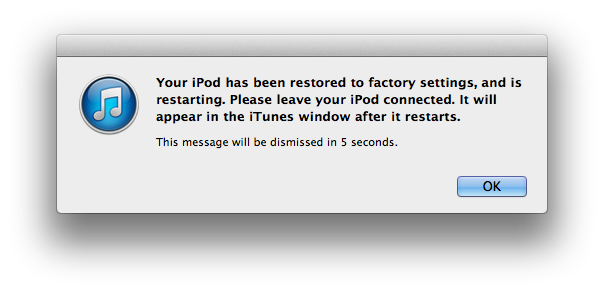
If you see the following message from iTunes, then your iPod has been restored successfully. You can then reload your music and other media by syncing in iTunes.
| Back: |
Ask: |
Rate:
 |
Share: |
Print: |
Article ID: AT4848
|
Previous Article |
Next Article |
|
Fixing the "Effective Power" Bug on iOS |
Forgot Passcode or Unable to Restore |
Overall User Rating: [1 RATING]

Comments (3):
By Lastrezort on 11/27/15 • Reply
After attempting several other procedures and feeling I was about to own a new paper weight, I ran across this article. This is PFM. It worked as described. I have an ten year old 4th generation Pod that had been neglected for the past three years. The battery was fried so I did a battery replacement with the iFixit kit. Piece of cake. But, the iPod need some serious music program updates and iTunes 12 would not recognize it by throwing a 1433 error. I followed the procedures in this article and when I had finished I plugged it back into iTunes 12, followed the prompts and the rest is happy feet. Thanks
By CaptainPurple on 2/21/16 • Reply
Brilliant! Just tried this with iTunes 12.3.2 and a 60gb iPod Photo (ios 1.2.1?): worked fine, although it took a couple of software restarts.
By mauimei'd on 9/07/16 • Reply
I have a Nano 6 Gen with the error code 1433. It restored on the second attempt. It worked for me, thanks...you are brilliant!